
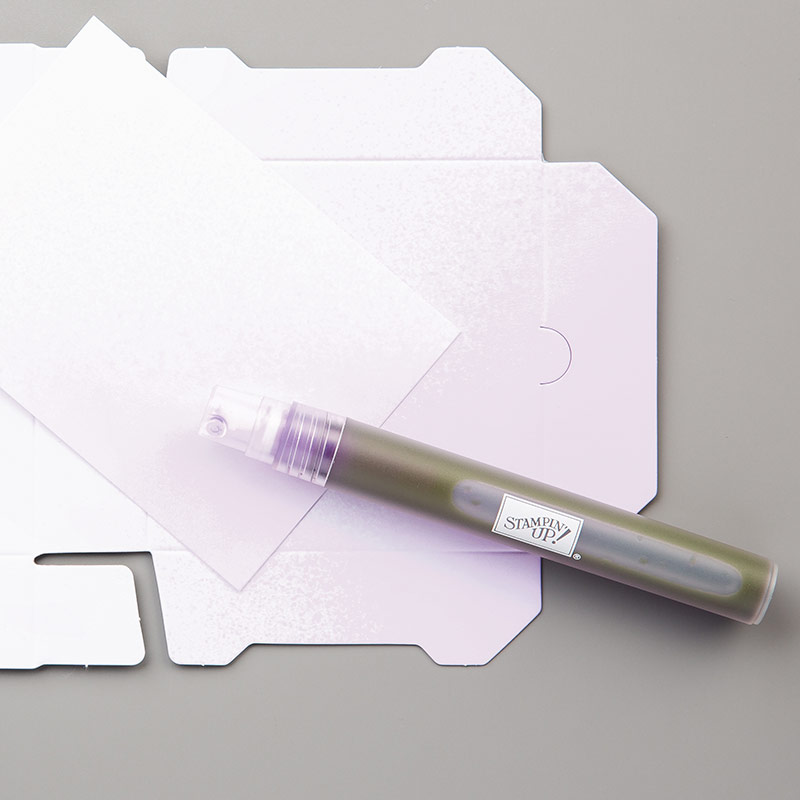
In my last post I showed you some ideas using Decorative Masks and sponging. Today in Part 2 I'm going to show you some easy yet effective ideas using spritzing. The Stampin' Spritzers from Stampin' Up! are a great way to get colour onto cardstock quickly. You simply take the top off, add water (I half fill) and some drops of re-inker until you get the desired strength of colour. Then you can spritz away. Just a word of warning - spritzing is imprecise and the outcome is really a bit hard to predict. I like to use watercolour paper to help with ink absorption.
Before I show you how to do this technique I wanted to show you the end product. I was really happy with the outcome so wanted to give you some incentive to keep reading!
 |
| I'll show you this shadow die cut technique later in this post. Hang in there! |

So what do you think? Let's get to the 'how to' part. The spritzing is easy. Place the mask over your watercolour paper and lightly spritz. I find that a sweeping motion while depressing the nozzle works well. You will get a bit of leakage under the mask but I think that adds to the effect. I used 3 colours and slightly overlapped them while they were wet to get an ombre effect.
Bonus print - before you lift off the mask, place another piece of watercolour paper over the mask and take a 'print'. Don't waste that ink! To get the best print, I rub the back with a stamping block.
Here are the pieces I used for the cards and the prints I took from the wet mask. The prints will make great background papers for another project.


These are the finished cards.


I have seen this shadow die cut technique on Pinterest but haven't found how to do it. I had a play around and have found a way that works for me.
Shadow die cut technique:
- Die cut the word from your base paper (stripy in this example).
- Die cut the word from black or another dark colour cardstock.
- Remove the word from the base paper but keep the letter insides.
- Adhere the background paper to your card front.
- Place glue inside the space where the word has been cut from. In this case on the black.
- Fit the black word into the cut out space and add the base paper letter insides. eg middle of 'a'. See picture below.
- Place glue on the back of the base paper word die cut. Place it over the black word but slightly to the left and above so that you get the shadow effect.

I hope you love this technique. Part 3 will be about ghosting or shadowing.
Comments
Post a Comment
Thanks for stopping by. I love to hear from you so please leave a comment.
In line with new Data Protection legislation (GDPR) by commenting you do so in the knowledge that your name & comment are visible to all who visit this blog and thereby consent to the use of that personal information for that specific purpose.