


Welcome back to another Stamp Review Crew blog hop. The Stamp Review Crew is a group of Stampin' Up! demonstrators from around the world that get together on the 1st and 3rd Monday of each month for a blog hop. Each hop we showcase one stamp set and show you just how much you can do with it. Get ready for lots of inspiration and lots of reasons to use (or buy😊) this stamp set! Currently you are visiting Lou Kitzelman on the Sunshine Coast, Australia. Hi!
For this hop we are featuring Magical Day. I love this set. It will not be in the Annual Catalogue - due for release on June 1 - so make sure you get in and snap it and the coordinating framelits up before they sell out.
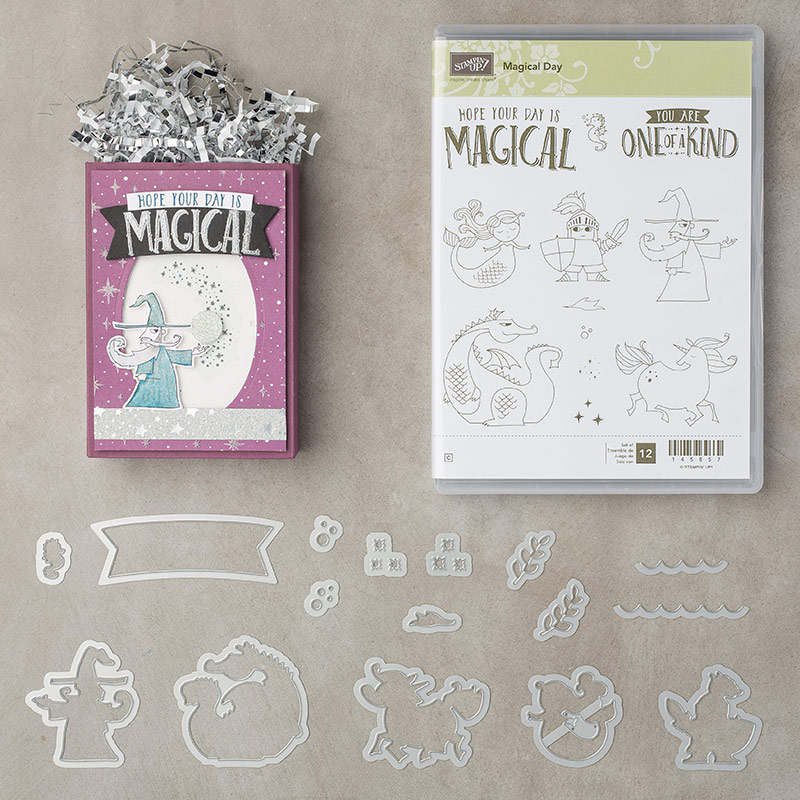
As this post goes live I am teaching a class using this set and Shimmery White Embossing Paste. Here are 2 versions that class participants can choose from.

I think the pairing between this cute Magical Day stamp set and Shimmery White Embossing Paste works perfectly. Just by sparingly adding some drops of reinker to the paste and not mixing it completely you get this great ombre effect.

For my cute unicorn card I have used Pink Pirouette and Peek-a-boo Peach ink in the paste. I love that the sparkle still comes through. I have just placed the mask on a jaunty angle - just adds a fun design element. The mask/stencil is from the Sweet Soiree pack.

And of course a mermaid needs some glittery, coloured sea grass to loll about in!

This time I added Wild Wasabi and Emerald Envy ink to the embossing paste and dabbed it randomly over the mask before smoothing with a palette knife.

I love how high the embossing sits. It really helps set off the images from the Magical Day Stamp set.

Wondering about the sentiment? I used parts of the 2 sentiment stamps from the set, just colouring the bits I wanted with makers. I thought it was a great way to get another sentiment for the card front.

Make sure you hop around to see what all the crew have done with this gorgeous stamp set. Next up you are off to the UK to visit the super talented Jay Soriano.

For these cards I tried to use lots of products that will be not be in the next catalogue, due for release on June 1. Make sure you snap them up fast before they are sold out.
Product List


Can I come to your classes?? Love both examples, Lou.
ReplyDeleteOh Bron you would always be welcome. Pack a cut lunch though - it is a bit of a hike!
DeleteLove these cards. If you don't mind me asking, what stencil/mask did you use? Thanks for sharing
ReplyDeleteThank Jenny. I forgot to mention the mask in my post. Sorry about that. It is from the Sweet Soiree Decorative Mask pack. I love the versatility of it.
DeleteThe sea grass for the mermaid is fabulous - but I'm trying to figure out what you used for the stencil.
ReplyDeleteThanks Heidi. The mask is from the Sweet Soiree Decorative Mask pack. In my haste to get the post done I left out the vital pieces on info. Ooops!
DeleteHaven't tried this paste yet. But, I love what you did with it. Did you mix two piles of paste, one for each color and about how much paste to use and how did you color your paste? I'll be waiting for your answer before I try this. Thank you so much for sharing!
ReplyDeleteHi Gloria. Warning - the paste is addictive! You will love it. I put 2 small dobs of embossing paste out - about a teaspoon - then added a touch of reinker to each. Then I just dobbed the 2 colours around over the mask and then smoothed with a palette knife to blend a bit. Let me know how you get on and if you have any more questions I am only happy to help. L x
DeleteHi Lou - what a great use of the embossing paste. I ave yet to experiment with this, but you sure have it mastered. Great job!
ReplyDeleteWow - I love the two variations and I bet these look amazing in person with all that sparkle!!! Kelly x
ReplyDeleteOh, Lou! Your use of embossing paste is so creative! You have inspired me to pull it out and use it. I love these samples!!!
ReplyDelete