


Welcome back to another Stamp Review Crew blog hop. The Stamp Review Crew is a group of Stampin' Up! demonstrators from around the world that get together on the 1st and 3rd Monday of each month for a blog hop. Each hop we showcase one stamp set and show you just how much you can do with it. Get ready for lots of inspiration and lots or reasons to use (or buy😊) this stamp set! Currently you are visiting Lou Kitzelman, Sunshine Coast, Australia. Hi!
This was a set that I received in my goody bag at the November OnStage event for Stampin' Up! Demonstrators. (Pssst registration for the April event opens tomorrow so why not join my team so you can come with me?) I might have skipped past this set in the catalogue so I am glad I was given it. There are fab sentiments and the images are so versatile. As soon as I saw the 'Treat Yourself' stamp I thought of making some gift card holders and dug out class notes from years ago. (Everything old is new again!). I was quite proud of myself that I was able to use every stamp on these 4 cards.

I've had a request to make some male and teen cards for an order so these were perfect. I have included the instructions for you at the end of this post. You get 2 cards from an A4 piece of cardstock and from a 10 cm strip of Designer Series Paper you get 2 card fronts and the strips inside plus some mats for the front. Multitasking at it's best. I used both sides of this True Gentleman DSP.

When you open up the card there is a pocket for your gift card or scratchies.

I love how it stands up by itself. Apologies for the photo quality. All of these colours seem hard to capture. Well it was in our sweltering Australian heat wave yesterday! I used the Everyday Label punch (which has carried over from the Holiday Catalogue) to create the pocket opening.

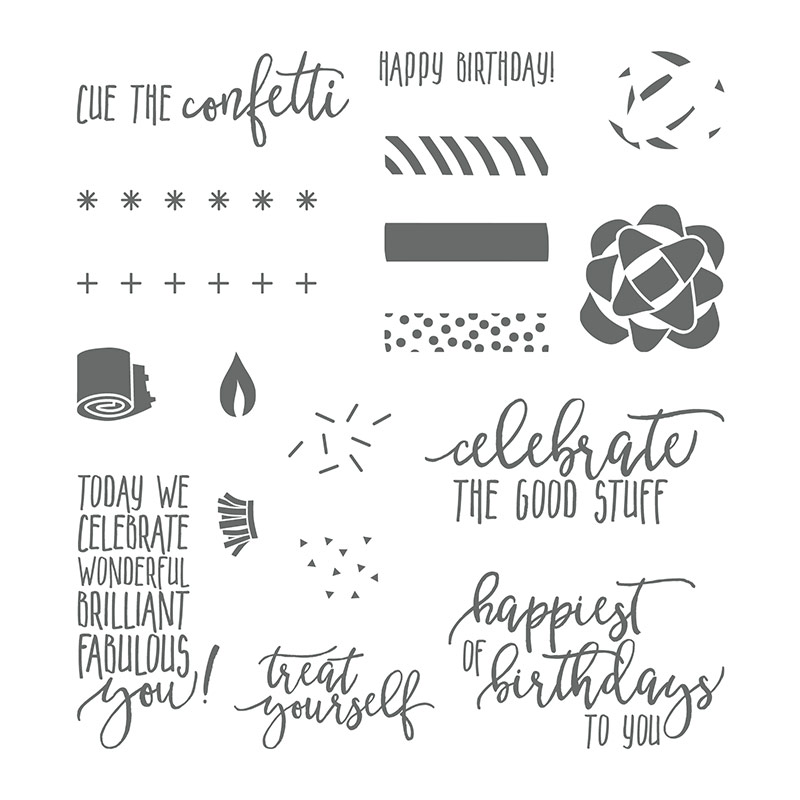
I had fun using all of the images and sentiments in this stamp set. I love this bow!

There are lots of little images that you can use for confetti and borders. It is a quick way to add a bit of interest to your card insides. This shot gives you a better idea of how I punched the pocket opening. I punched in from each side making sure to line them up. I might have to made a video of this! I am gathering up the guts to give videoing a go FYI.

The Bubbles and Fizz DSP - free with qualifying orders - has some great patterns and colours in it. Perfect for some birthday and celebratory cards. I love the blower thing. I am sure it has a name but I just can't think of it.


And you can even make some candles from this set!

I love the small Happy Birthday stamp. It is one that I will use a lot.

Here are the measurements in case you would like to make one yourself. They are super easy! Fold on the score lines and add tape on the inside of the 10.5 cm line and the sides. Make sure you don't tape along the 14 cm line as this is where you will punch your pocket opening from. Once you cut, and score you can look at my pics above and it will all make so much more sense. Trust me!

Make sure you hop around to see what all the crew have done with this gorgeous stamp set. Next up is Ann Schach.

Product List


What fun gift card holders and awesome birthday cards! The sentiments are perfect for the surprise inside!
ReplyDeleteSuper cute cards and great gift card holders! I love how they are all variations on the same basic idea. Thanks for including the tutorial!
ReplyDeleteLove your clever little gift card holders. Those little greetings are perfect for it. This would be a great little class.
ReplyDeleteWow what great cards, love your fun layouts, so super cute and a great idea to hold a gift card, many thanks for sharing, I defo will give them a go, thanks for the tutorial :)
ReplyDeleteHow fun, Lou! You can never have too many gift card holders.
ReplyDeleteWay to show off the sentiments! I love that you've used different DSP options than the Picture Perfect Party! Thanks for the awesome tutorial! Kelly x
ReplyDeleteOMG! I love these so much! Such a great way to give gift cards....and you have done an amazing job showing off the versatility of this stamp set!
ReplyDeleteI love these Lou! They make my imagination race with project ideas. Thanks so much for all the inspiration!
ReplyDeleteI am so glad you used the True Gentleman and Bubbles and Fizz DSP for these, totally opens the mind to new ideas! And now I have to make some of those gift card holders :) Thanks so much for the instructions!
ReplyDeleteLove these adorable cards, Lou! I can't wait to try my hand at a gift card holder! I love the choices of colors and patterns you used. Awesome!
ReplyDeleteSo much fun Lou! This set has endless possibilities. Love the gift card holders (thanks for instructions) and how you've made everything a little more dapper using the True Gentlemen DSP.
ReplyDeleteOh, I love these GC holders! Perfect little gifts for a variety of recipients!
ReplyDeleteOh what a fab set of gift cards, Lou and thanks for the instructions.
ReplyDeleteI love these fabulous gift card holders!
ReplyDeleteFantastic cards!! I love the use of designer paper on both of them!
ReplyDelete