
During OnStage you get to learn lots of new techniques and tips and see lots of samples. So much crafty eye candy! Lots of demonstrators make cards to swap with others. So much talent! I was a bit short of time so only made some swaps for the girls from the Colour INKspiration design team. Here are the 11 of us who attended the Sydney event.

I had so much fun shrinking dragonflies! It took me back to the days when we didn't know how dangerous it was to melt plastic and we used to shrink down chip packets to make into earrings. I know what you are thinking...and yes....I was such a cool kid! I think shrink plastic might just be my new favourite thing!
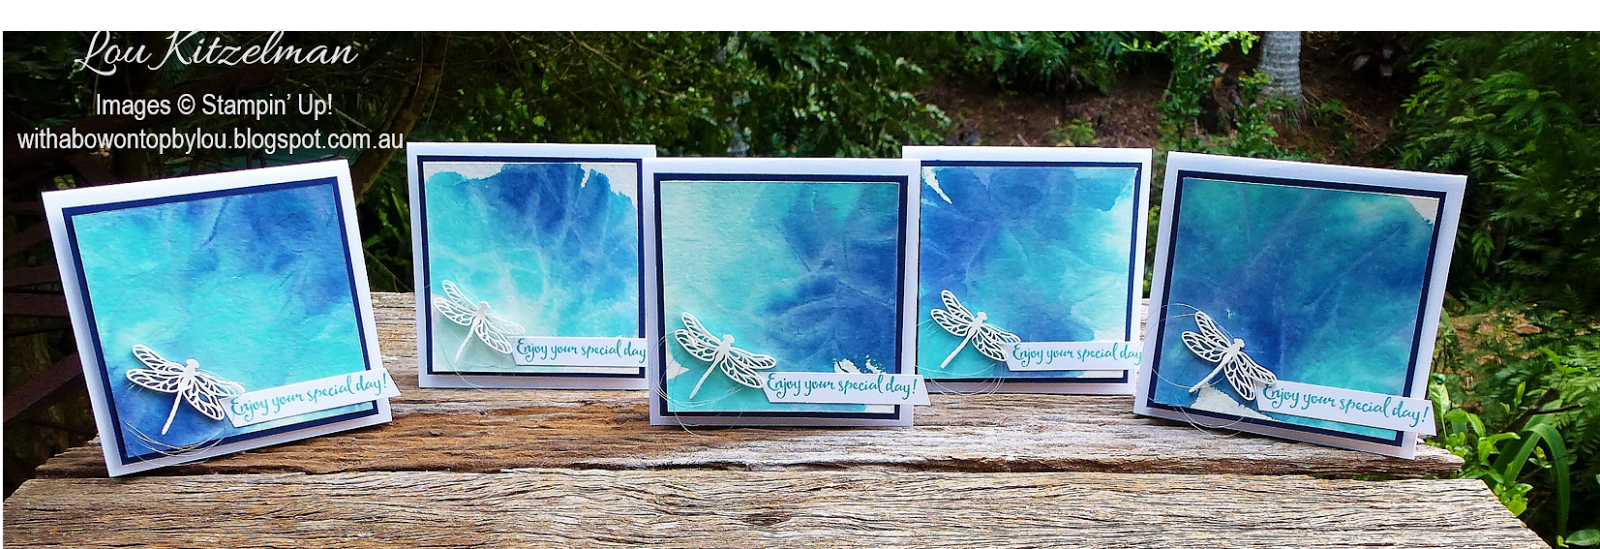

Don't love you love the cool backgrounds??? So easy to do. It is called the Glad Wrap Watercolour technique. It allows you to mix colours easily and get cool drying lines.

I was indecisive so I did 2 different colour combinations.

Glad Wrap Watercolour Technique:
- On a piece of scrap paper trace around your watercolour paper so that you know the size you are working on.
- Place a piece of Glad Wrap over the top of the paper.
- Choose 3 reinker colours and add a few drops to about 2 cm of water in a Stampin' Spritzer. Test on scrap until you are happy with the colour intensity.
- Spritz plastic wrap a few times with each colour, making sure to stay well within your guide.
- Place the watercolour paper face down and quickly turn over the watercolour paper with plastic wrap attached.
- Use the plastic wrap to move the colours around.
- Scrunch the plastic wrap up slightly so that you get interesting lines as it dries.
- Remove plastic before ink is completely dry. Your climate will determine the drying time, but for me it is about 15 - 20 mins.

The results are just so yummy.

This background is made using Bermuda Bay, Pool Party and Night of Navy.

This background used Sweet Sugarplum, Peek-a-boo Peach and Daffodil Delight.

I was so happy with the results that I raised the front panel up with foam adhesive strips and made it into a tent card. You can see how to make it by looking at my other versions here and here.

The back is really simple. I stamped this spotty stamp and before reinking I stamped a second time but offset it slightly so that I got a shadow effect.

And for the my lovely team members I made a larger version that is a calendar. The group of dragonflies is so adorable when you shrink it.


Joining Stampin' Up! is truly one of the best things I have ever done. I love being inspired and challenged without any stress. I would love to have you in my team. Join now so you can see all of the new products before anyone else. Read all about joining my team here and please contact me if I can help with any questions. Off for a snooze now! My brain hurts from inspiration overload. What a terrible problem to have.....not!
Product List


thanks you so much for the technique description, I've never done this but I'm sure about to give it a go - could become my next "thing" love it. I was so glad to receive one of your swaps but so much more gold to meet you and have a chat. Not sure when I am coming to the sunshine coast next- but I am coming, and i'll call you then!!!
ReplyDeleteFabulous to meet you too. Will be great to catch up again in the future.
DeleteGreat minds think a like. I tried to use shrinky dink with the dragonfly die this apst seekend because I want to make gifts for the women in my Stamp Club but I couldnt get the plastic to release out ofmthe die without breaking the plastic. Can you tell me the secret to your success?
ReplyDeleteHi Rosemarie, I used the die brush to gently get them out. I did break a few here and there but when they shrink they sort of fuse back together.
Delete