You really have to get your hands on a copy of the 2016 Stampin' Up! Holiday Catalogue. If you live in Australia contact me if you would like one. There are so many beautiful products in there that you can order from September the 1st. As a bonus lots of the products can be used for lots of different occasions. Always helps when justifying a purchase I think!
One of my favourite products is a stamp set called Glamper Greetings (142202). The stamps are photopolymer which makes it super easy to create scenes. This set has you covered for birthdays, Christmas, Halloween and much much more. Today I have made another shadow box card (you might have seen my hydrangea one last week). This is for someone taking off on a great adventure on the open road. This little shadow box will be easy to transport and will add a homey touch to the 'glamper'!
This shadow box is made from a piece of A4 cardstock scored at 1/2" increments. I know I usually use metric but the 1/2" measurement works really well. Making them is so easy and the best video to watch is by Jan Brown. She has some great tips for constructing this card so that you get perfect corners all meeting. Pay particular attention to her tips on folding and adhering the sides and using tape backing under the mitre section. I completely forgot to do this in my first attempt and my lovely husband marked my mitred corners at 7/10. Rude!
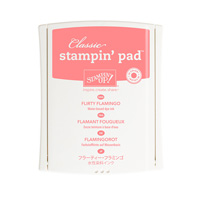
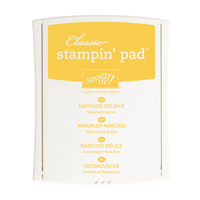
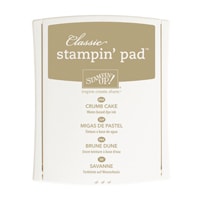
I just started stamping on watercolour paper and then used an aqua painter and ink from the lid of my inkpads in the challenge colours. It is a simple design - wait until you see my Christmas version next week!
Because I was limited to 3 colours I have used different strengths of each colour. To make the lights and door window look glass-like, I have added a coat of glue from a Fine Tip Glue Pen.
One of my favourite products is a stamp set called Glamper Greetings (142202). The stamps are photopolymer which makes it super easy to create scenes. This set has you covered for birthdays, Christmas, Halloween and much much more. Today I have made another shadow box card (you might have seen my hydrangea one last week). This is for someone taking off on a great adventure on the open road. This little shadow box will be easy to transport and will add a homey touch to the 'glamper'!
I have been itching to ink up this set so what better way than for a challenge or 2!!!
This shadow box is made from a piece of A4 cardstock scored at 1/2" increments. I know I usually use metric but the 1/2" measurement works really well. Making them is so easy and the best video to watch is by Jan Brown. She has some great tips for constructing this card so that you get perfect corners all meeting. Pay particular attention to her tips on folding and adhering the sides and using tape backing under the mitre section. I completely forgot to do this in my first attempt and my lovely husband marked my mitred corners at 7/10. Rude!
I just started stamping on watercolour paper and then used an aqua painter and ink from the lid of my inkpads in the challenge colours. It is a simple design - wait until you see my Christmas version next week!
I've added a card to the back which forms a stand and has a place to write well wishes.
I've kept the inside simple.... lots of space for a message.
The scene in the frame is raised on foam adhesive strips.
Because I was limited to 3 colours I have used different strengths of each colour. To make the lights and door window look glass-like, I have added a coat of glue from a Fine Tip Glue Pen.
It dries in no time and is perfect for this bunting as well.
Don't forget to contact me if you would like a copy of this catalogue.
Product List 


Very cute little scene card - with lots of lovely little extra touches. I love how it's so tactile - with raised bits and the frame. Chantell JAI
ReplyDeleteWow Lou, your frame is awesome and l love the sweet summery scene you've created. Great to see some new toys in action too! Thanks for joining in at just Add Ink.
ReplyDeleteJust gorgeous! What a beautiful piece of art, and gift, all in one, Lou. Thanks for joining in the fun at Just Add Ink this week. :)
ReplyDeleteI am sooo not a caravan lover irl but I totally adore your little framed scene, Lou. The colours, the placement & the whole look is just lovely. And I say 'pfft' to your husband about your mitres ;) Glad you could play along with us at JAI again.
ReplyDeleteDi
Wow! This is just amazing! I just love what you have done with this stamp set, love the colours and just love everything about it!
ReplyDeleteWOW, WOW, WOW! This is fabulous Lou! Love that you've turned the shadow box into a card. Loving all your little elements. Makes for a fun and summery creation. Looking at it is making me long for the weather to warm up to go travelling again. Thanks for playing along and I hope we see you again next week at Just Add Ink. Rochelle xo
ReplyDeleteLove this Lou...especially that it is also a greeting card and can stand up so easily.Please save a catalogue for me! Cheers dears, Rosie Posie.
ReplyDeleteI love shadow box cards! In fact I've made a very special one for my son's 16th birthday this weekend. Your scene is beautiful, Lou. Love that little van. Thanks for sharing your gorgeous creations with us at Just Add Ink so regularly. x
ReplyDeleteOh, my lord!! This is amazing. I actually thought you have used a real frame and created a shadow box, but this is even better because it is a card! Fantastic! Thanks for playing at Global Design Project this week.
ReplyDeleteFabulous project, Lou!! I just received a copy of the new Stampin' Up catalog in the mail, and I immediately fell in love with this stamp set (and a bunch of others too)!!!
ReplyDeleteAmazing project Lou! I am so inspired! Congratulations on winning a designer spot! Megan xx
ReplyDeleteThis is so awesome!!!! I just love everything about your shadowbox card!!! Congrats on the win over at GDP!!!
ReplyDeleteThis comment has been removed by the author.
ReplyDeleteJust popped in to say congrats on your win at GDP! So deserved - what a work of art! Looking forward to having you on the team as a guerst designer! x
ReplyDelete