This is always a bitter sweet time - saying goodbye to much loved and favourite products to make way for what will become new favourites! Today I am going to show you one of my favourite retiring products - Decorative Masks. I love everything about them - their ease of use, simplicity and versatility. They are a quick way to add a great design element to all craft projects especially cards and scrapbook layouts. Two Decorative Masks sets are retiring - Happy Patterns and Dots & Stripes.
Here are a few samples that I have made to show off some techniques you can do with the masks. I have also tried to use some retiring stamp sets, punches, card stock and ink.
So on to a showing how to achieve these looks. The most obvious technique to do with Decorative Masks is sponging.
Simple sponging - Place the decorative mask over the cardstock, dab your ink pad with a sponge or dauber and tap the ink onto the cardstock. Clean the mask after each use. Combining this with the following techniques gives fantastic results.
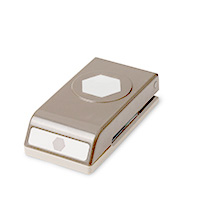
Partial sponging – This gives a great background for die cuts and allows you to quickly create an interesting card or scrapbook page. You can place masks on an angle and only partially sponge – the stripy one works well for this. Here I have used the Six Sided Sampler stamp set and coordinating hexagon punch.
Embossing folders - The Elegant Dots Textured Embossing Folder coordinates with the dot and line mask. It gives great definition to the sponged design. Sponge first and emboss second. It makes lining up the embossing folder much easier. If you decide to use the reverse side of the embossing you'll need to reverse the order.
I have used a dauber to add Lost Lagoon to Whisper White cardstock here. The retiring stamps sets Sassy Salutations and Summer Silhouettes complete the design.
Ombre sponging – Use about 3 colours that will look nice when blended. Sponge about 1/3 of the area and then start the next colour, slightly overlapping the first. Sponge the 3rd colour in the same way. This technique works well with the shadow die cut technique below.
Shadow die cut technique:
1. Die cut the word from your decorated paper.
2. Die cut the word from a dark colour of cardstock. This will be the mat or card base – depending on how many layers you have.
3. Remove the word from the base paper but keep the letter insides.
4. Adhere the decorated paper to your card front making sure you put glue around where the word has been cut out.
5. Fit the dark word into the cut out space and add the decorated paper letter insides. eg middle of 'a'.
6. Place glue on the back of the decorated paper word die cut. Place it over the dark word but slightly to the right and above so that you get the shadow effect.
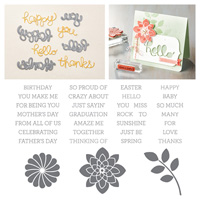
The Crazy About You stamp set and coordinating Hello You thinlits (which are NOT retiring - yay) work really well for this technique.
Ghosting or shadowing is such an effective way to use the masks. It is so easy but gives stunning results.
1. Place a mask on a piece of cardstock. Mid colour strength works best. (Not too light and not too dark.) Sponge white craft ink through the holes using a sponge or dauber. Remove mask, clean and allow cardstock to dry naturally or use a heat gun to speed up the process.
2. Place the mask back over the white. Now move it slightly up and to the right. Sponge or daub ink in the same colour as the cardstock. It will create a 3D shadow. You can also sponge white onto a neutral card stock such as Crumb Cake and then add different colours in the same manner.
3. Stamp any images over the top or add die cuts to embellish.
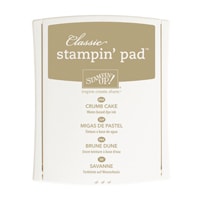
Of course you can experiment with colour combinations. For this example I have used Crumb Cake card stock and then Pink Pirouette, Melon Mambo and Rich Razzleberry over the White Craft ink.
When you have finished sponging the white craft ink through your mask it will be covered in the ink. Don't waste it - use it to take a print with a dark piece of cardstock. I run a stamping block over the back of the cardstock to get a good print. There is so much ink on the mask that you will get several prints. These make great backgrounds for cards. I think it is really effective on Basic Black card stock.
The inside is really plain but I wanted to show you the retiring Petite Pairs stamp set. It has pairs of sentiments so that you can use one on the front and the partner on the inside. This has been one of my most used sets. If you are like me and are sad to see it go, don't despair, there is a new set in the new catalogue with pairs of sentiments but in larger font that will soon be your new fave!
There are so many other techniques using Decorative Masks that you can try for yourself. Last year I did a series of posts showing some of these techniques if you want more information. Just a few include: Selective sponging, Doodling, Spritzing, and Using Gesso.
Make sure you hop around to all the blogs on this hop and leave some comments for everyone. We love hearing what you think and really appreciate you supporting our hops. Off to see what Cheryl has created for us now.
BLOG HOP PARTICIPANTS:
4. Lou Kitzelman - You are here!
5. Cheryl Algie
7. Kelly Kent









These cards are wicked!! loving the masking looks awesome :-)
ReplyDeleteLove these cards Lou thank you so much for sharing :)
ReplyDeleteJUST GORGEOUS -they are all my favourite! Excellent work!
ReplyDeleteI love your projects, I just can't choose which is my favourite.
ReplyDeleteI love your projects, I just can't choose which is my favourite.
ReplyDeleteGorgeous as always Lou - you are full of inspiration. Top of my list to try is the partial sponging. It looks great! Thanks for sharing. Kelly x
ReplyDeleteFabbo technique! Thanks for sharing your creations!!
ReplyDelete