
The new Stampin' Up! catalogue was launched today so you can order from it from today until the beginning of January. There are so many lovely products in it - I'm sure you'll find something to inspire you!
The catalogue is full of fantastic projects so today I decided to CASE (copy and share everything) one of the projects in it. Don't forget that Stampin' Up! catalogues are a fantastic resource for card designs, colour combinations and technique ideas.
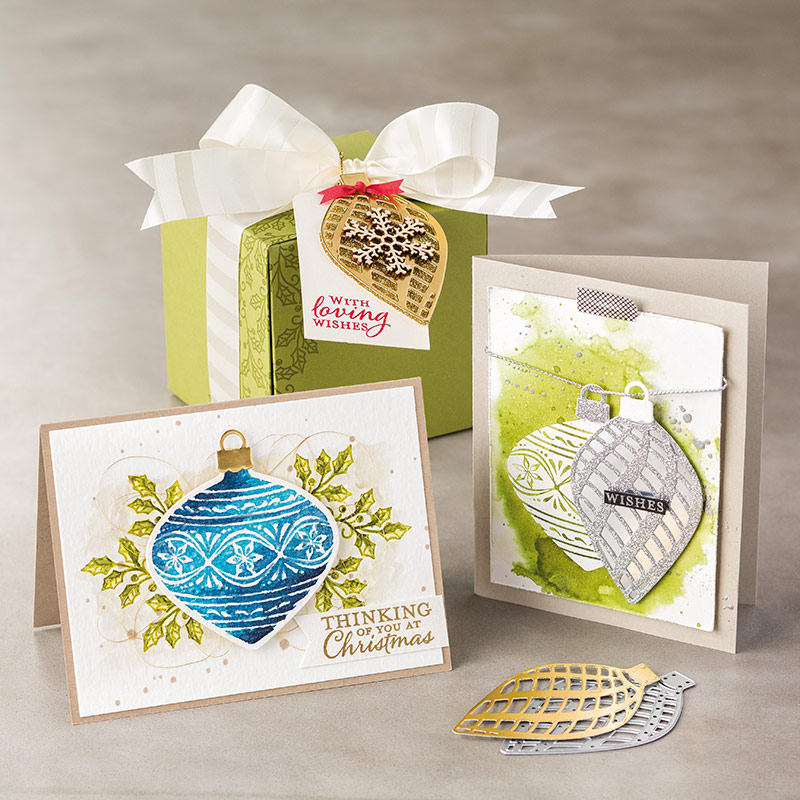
Here are the 2 cards that I have made to show you today. PS - if you come to my classes this is one of the ones we are making in September. These cards are made using the new Embellished Ornaments stamp set and the Delicate Ornaments thinlits dies. If you purchase them together in a bundle you get a 15% discount which is lovely.


To give the bauble a bit of shading, ink the stamp in a lighter colour first - in this case Rich Razzleberry. Ink a dauber with a darker tone and lightly tap the ink onto a little bit of the edge of the stamp on each side. I have used Blackberry Bliss. Stamp as normal.
You can find out how I did the watercolouring at the end of this post.

I firmly believe that if you are on to a good thing stick to it. I loved my first card so used the same idea but just changed the orientation and colour scheme. I added a strip of silver glimmer paper behind the front to give it a different look. For the bauble I have used Bermuda Bay and Island Indigo.

I thought of an idea for easy placement of the holly stamps. I think that it will be one that I can apply to many other stamp sets. I kept the stamp sticker sheet to use as a template. It is not sticky and is slightly plasticy so will be robust for reuse. It is also opaque which makes placing it easy. Place the shape where you will eventually place the stamp or die cut and trace a line a touch inside the shape. Your line will be covered by the die cut later. Then stamp the holly sticking out from where the die cut will be.

When you have finished stamping it will look a bit of a mess but of course this will be hidden. If you use watercolour paper for this as I have, remember to let your image dry a little bit before watercolouring with an aqua painter and ink from the lid of an inkpad. I tried not to use too much water so that the image wasn't washed away. Crumb Cake ink was used for a bit of shading around the image. To get the look from the catalogue I dotted some ink around.
Don't get too fixated on how your image looks. The mess in the middle can be a bit distracting so you may need to just place your die cut over the top periodically to remind yourself how it will look in the end. Watercolour is supposed to be a little imprecise and splotchy. Overworking the paper will ruin your image.

And of course I had my regular stylist on hand. Funny how one can be fast asleep one minute and then ready for work as soon as the camera is out!

The catalogue is full of fantastic projects so today I decided to CASE (copy and share everything) one of the projects in it. Don't forget that Stampin' Up! catalogues are a fantastic resource for card designs, colour combinations and technique ideas.
Here are the 2 cards that I have made to show you today. PS - if you come to my classes this is one of the ones we are making in September. These cards are made using the new Embellished Ornaments stamp set and the Delicate Ornaments thinlits dies. If you purchase them together in a bundle you get a 15% discount which is lovely.

The card that I CASEd is from page 15 of the holiday catalogue. It was so pretty that I just had to use it as a base for my design.
I folded my card as normal but cut 2.5 cm off the right hand side. I then added a 2.5 cm strip of paper from the Winter wonderland Designer Series Paper pack to the inside. It is a pretty pattern and if you put it one way up you see white trees and gold if it is the other way up. (It took me a while to work that out. I kept turning it around and thought I was going mad!)

To give the bauble a bit of shading, ink the stamp in a lighter colour first - in this case Rich Razzleberry. Ink a dauber with a darker tone and lightly tap the ink onto a little bit of the edge of the stamp on each side. I have used Blackberry Bliss. Stamp as normal.
You can find out how I did the watercolouring at the end of this post.

I firmly believe that if you are on to a good thing stick to it. I loved my first card so used the same idea but just changed the orientation and colour scheme. I added a strip of silver glimmer paper behind the front to give it a different look. For the bauble I have used Bermuda Bay and Island Indigo.

I thought of an idea for easy placement of the holly stamps. I think that it will be one that I can apply to many other stamp sets. I kept the stamp sticker sheet to use as a template. It is not sticky and is slightly plasticy so will be robust for reuse. It is also opaque which makes placing it easy. Place the shape where you will eventually place the stamp or die cut and trace a line a touch inside the shape. Your line will be covered by the die cut later. Then stamp the holly sticking out from where the die cut will be.

When you have finished stamping it will look a bit of a mess but of course this will be hidden. If you use watercolour paper for this as I have, remember to let your image dry a little bit before watercolouring with an aqua painter and ink from the lid of an inkpad. I tried not to use too much water so that the image wasn't washed away. Crumb Cake ink was used for a bit of shading around the image. To get the look from the catalogue I dotted some ink around.
Don't get too fixated on how your image looks. The mess in the middle can be a bit distracting so you may need to just place your die cut over the top periodically to remind yourself how it will look in the end. Watercolour is supposed to be a little imprecise and splotchy. Overworking the paper will ruin your image.

And of course I had my regular stylist on hand. Funny how one can be fast asleep one minute and then ready for work as soon as the camera is out!

Here is what you need to make these projects.
Built for Free Using: My Stampin Blog
Comments
Post a Comment
Thanks for stopping by. I love to hear from you so please leave a comment.
In line with new Data Protection legislation (GDPR) by commenting you do so in the knowledge that your name & comment are visible to all who visit this blog and thereby consent to the use of that personal information for that specific purpose.